Microsoft SQL Server databases are used by over 68% of sites that use
one or more database technologies. Surpassed by only Oracle databases,
it means most DB admins will have to install or manage SQL servers at
one point or another.
In this article, I’ll walk you through the installation of an SQL Server 2012.
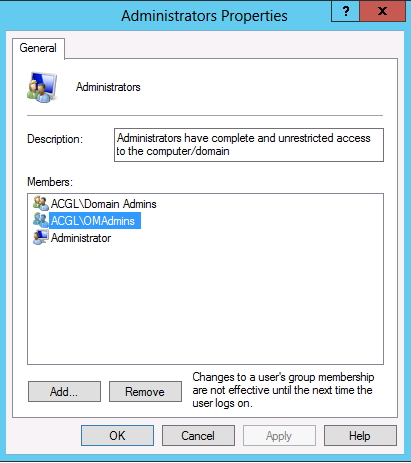
First, on MTLSQL01, open a session as an Administrator. Add the OMAdmins Group or any other group/user that will be used for this installation in the Administrators Local group of the MTLSQL01 Server and then close the session.
Note: The server name is an example. You can use whatever name fits your needs.

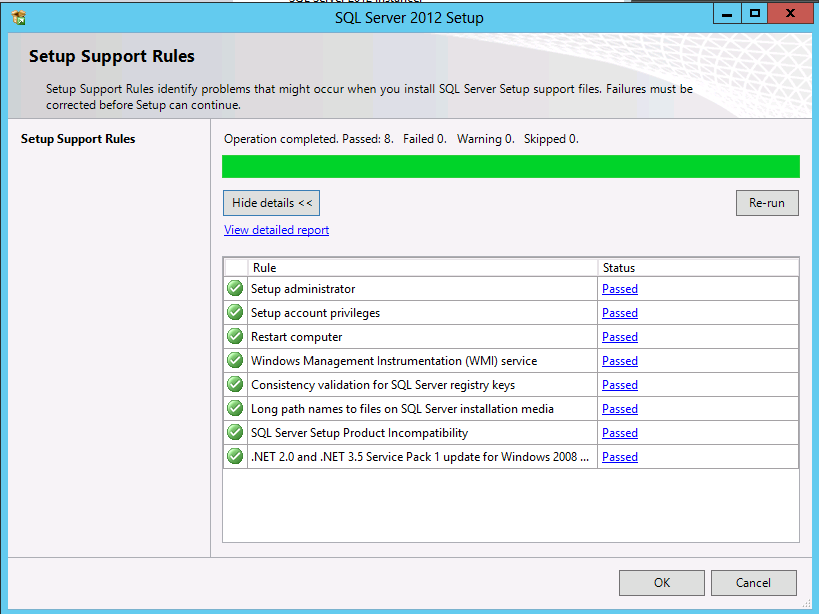
Open a new session with the OMAdmin user. Click Setup and then Installation. Then click the New SQL Server stand-alone… and Show Details.

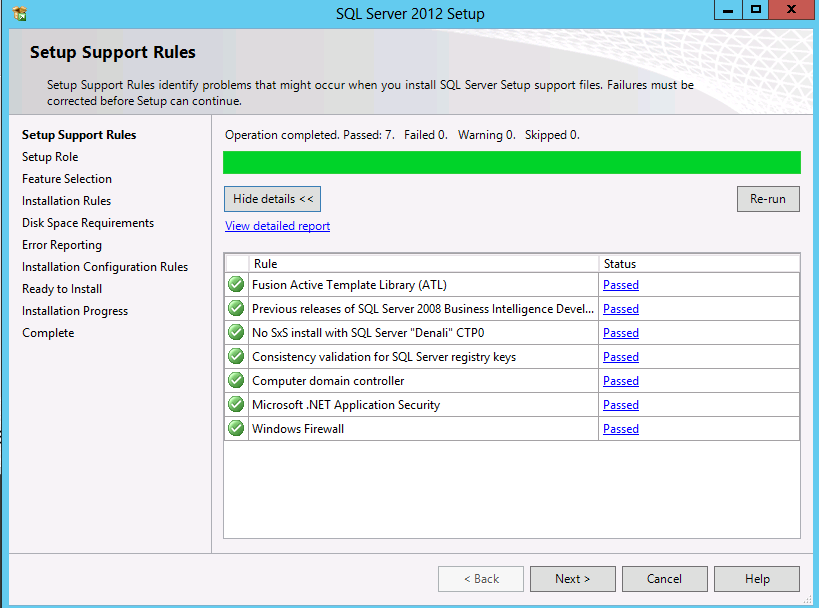
Validate that the status for all rules displays Passed. Click OK once it’s done.

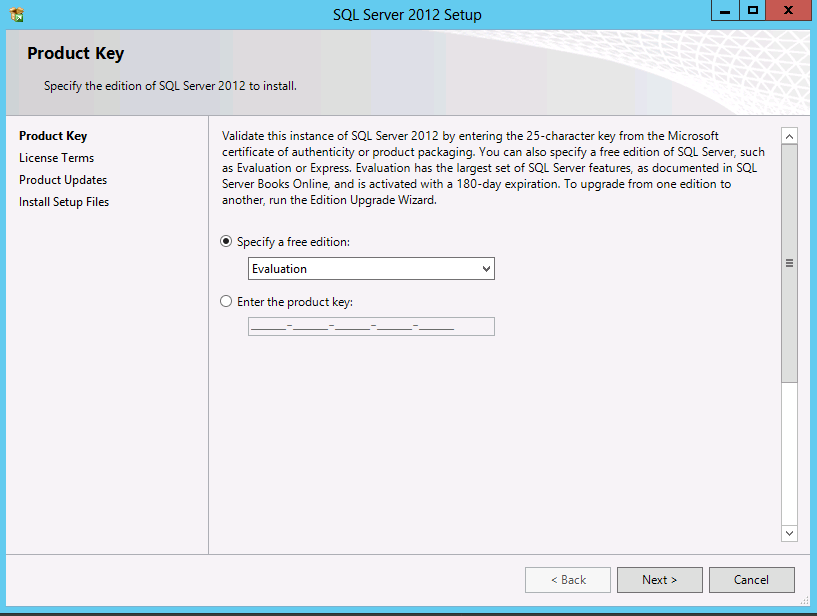
Select Specify a free edition if you have an evaluation version or Enter the product key if you have a serial number. After entering your serial number (or picking the free edition), click Next.

Select I accept the Licence terms. Also, if you want to send usage data to Microsoft, you can click that box too. Click Next to get to the Server Setup Update screen. If you want to install updates, click the Include SQL Server Setup Update and click Next. The update will download and install. Once it’s done, click Show Details and validate that the status for all rules displays Passed.

Once you’re done with the update installation, continue to the Setup Role screen. Select SQL Server Feature Installation and continue.
This server will be used only by the Operations Manager Database (the short time database). The SQL Reporting Service will be installed on another server.
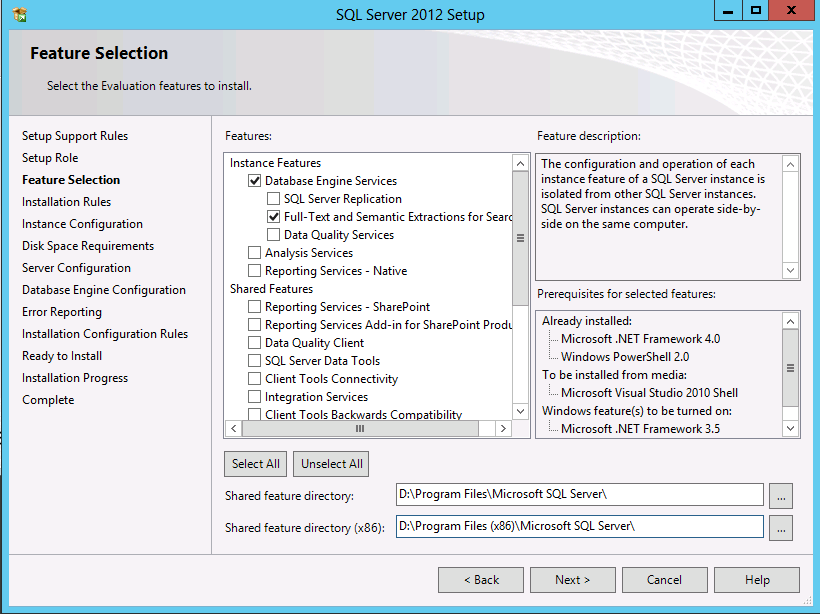
Select Database Engine Services and Full-Text and Semantic Extractions for Search (the latter is not mandatory). Change the path from C: to D: or any other disk.

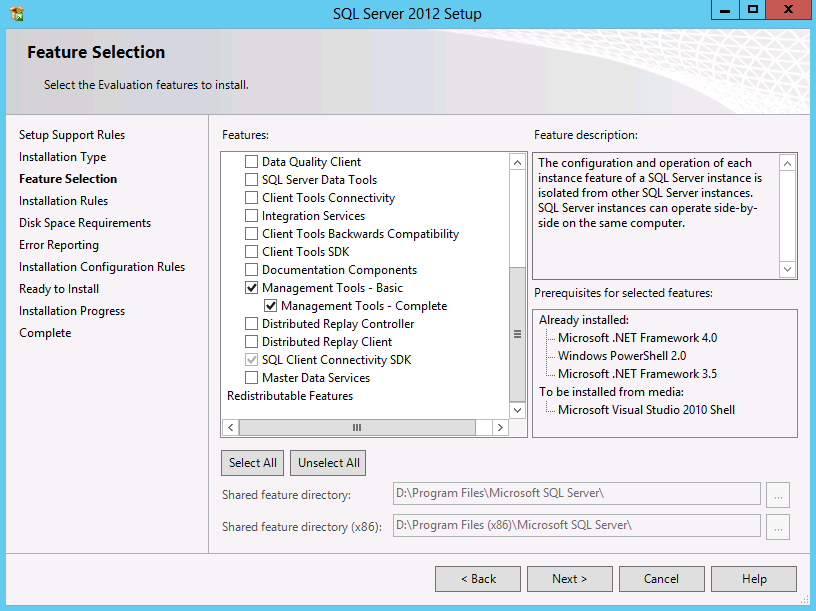
Select Management Tools Basic and Management Tools – Complete. This will install all tools needed to manage the SQL Server. You can then continue to the next screen. Once again, check the Show Details to validate that the status for all rules displays Passed.

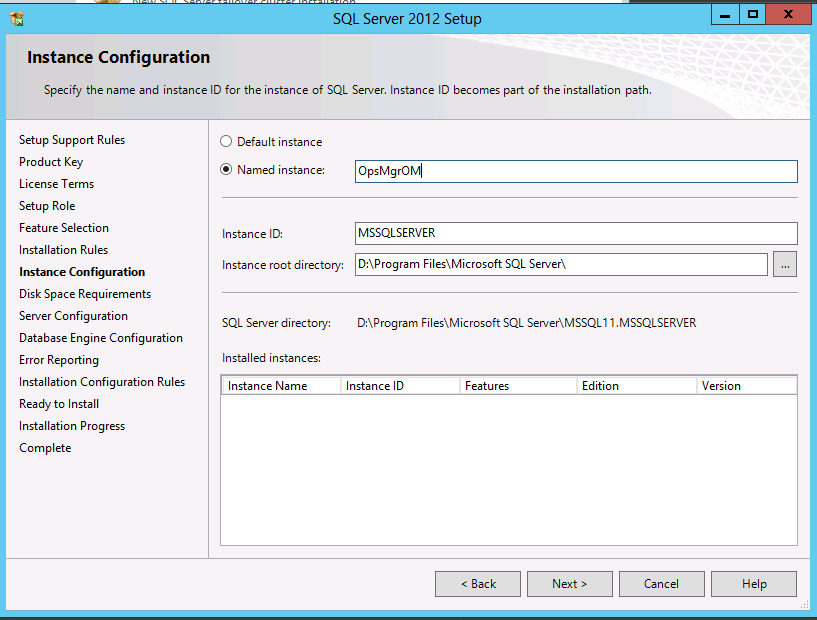
Select the Named Instance option and type OpsMgrOM. If you want, you can also install SQL without an instance. Once again, change the path from C: to D: and continue to the next screen. In the Disk Space Requirements screen, just click Next.

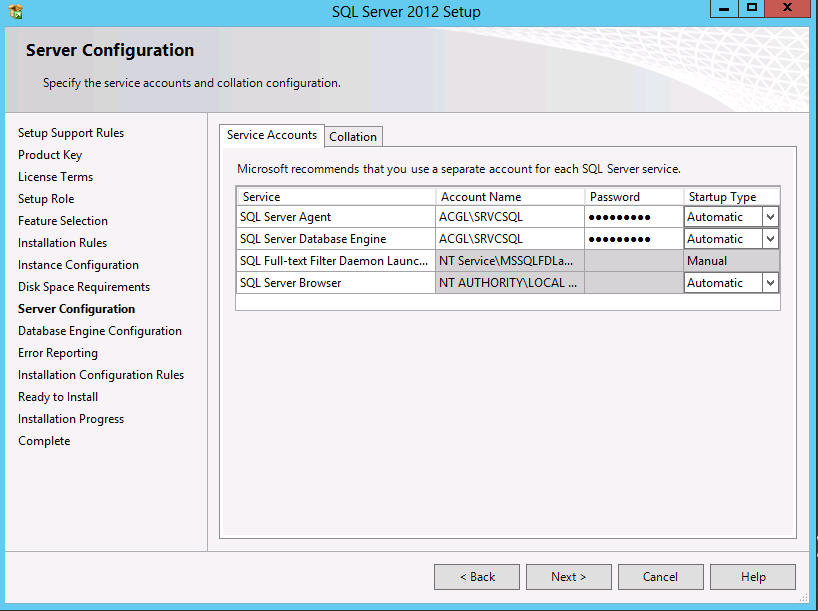
Select a domain user for both the SQL Service Agent and the SQL Server Database Engine. This user is a Domain User and doesn’t have any admin rights on the SQL Server. The Startup type must be Automatic. Then click on the Collation tab.

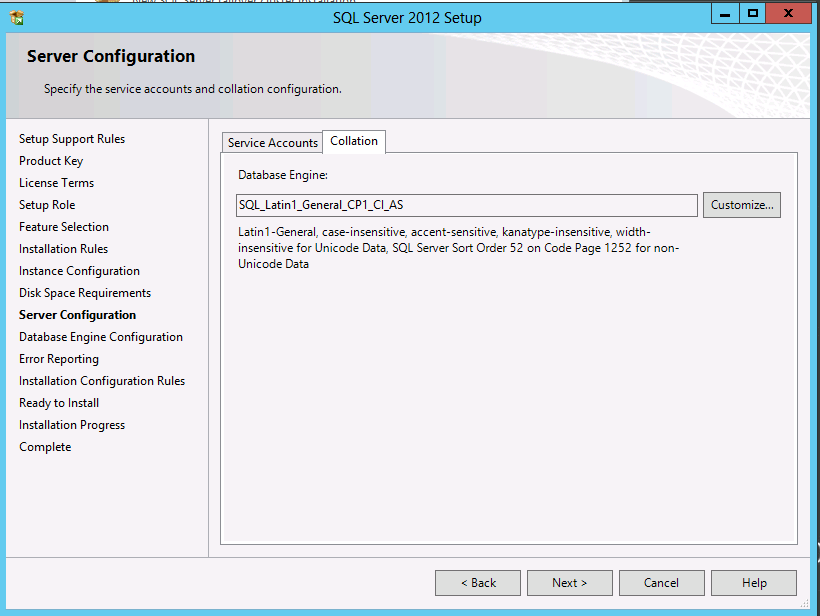
At this point, you can choose the default collation (SQL_Latin1_General_CP1_Cl_AS) or choose another supported collation. Click Next.
Note: The collation cannot be changed after the SQL installation. It is very important to select the collation that is supported.

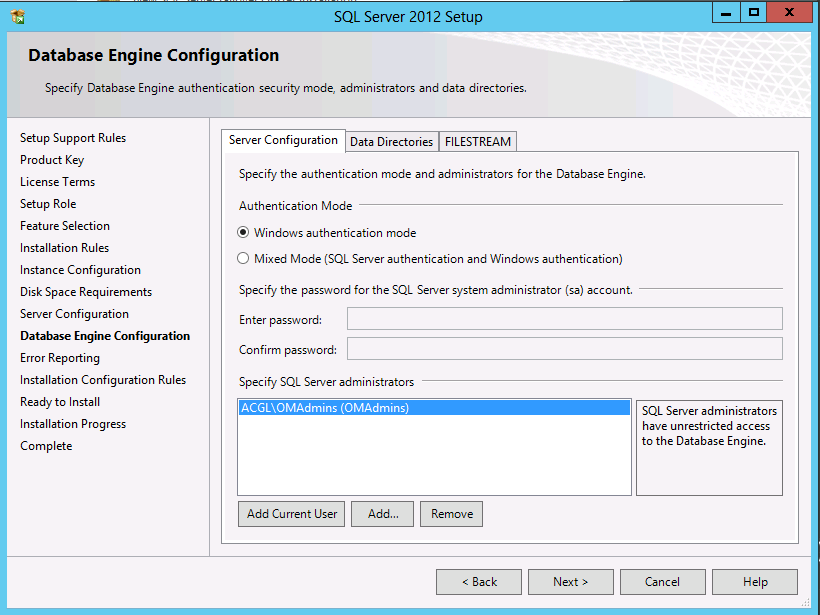
Now, select Windows authentication mode. Click Add and select the OMAdmins group. Click Next. All user from this group will be a SQL SysAdmin.

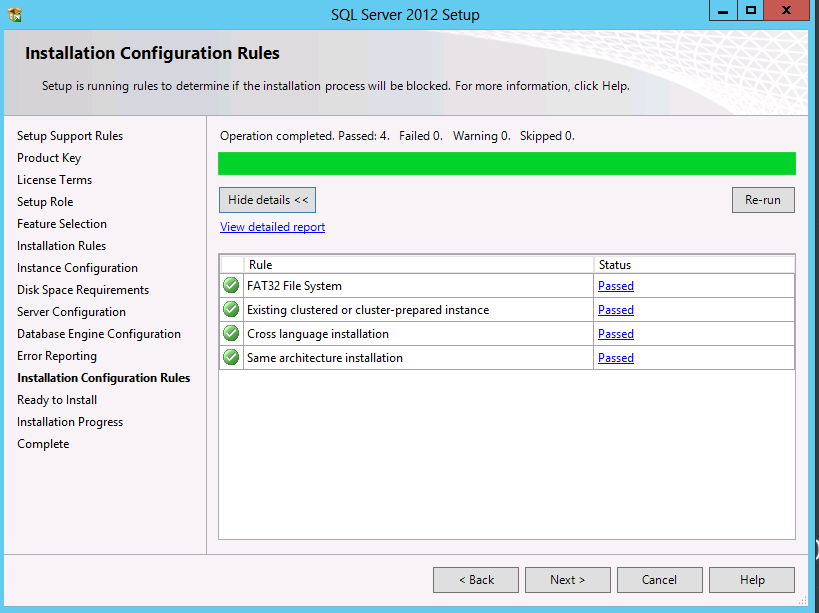
Click Next on the Error Reporting screen and then Show Details. Once again, validate that the status for all rules displays Passed. Then, click Next.

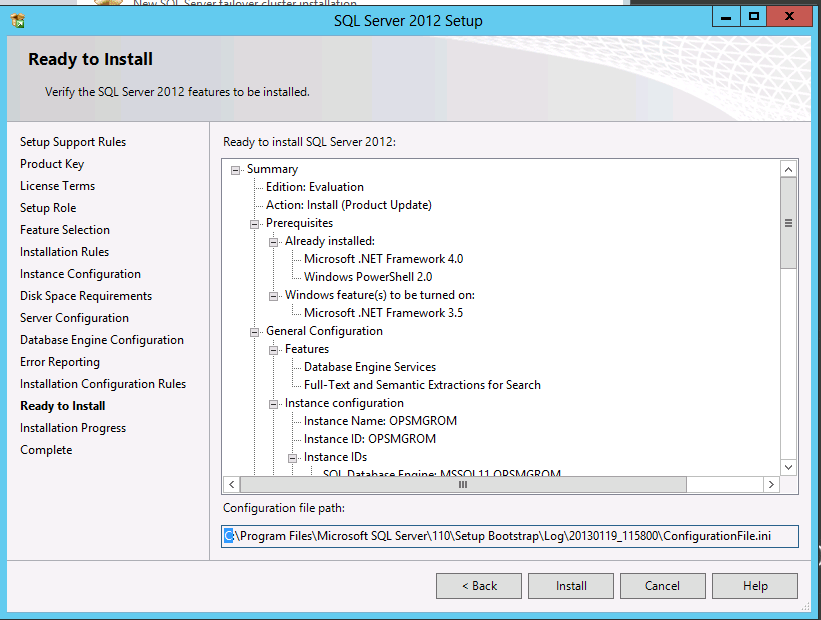
Click Install to begin the SQL Server 2012 installation. Validate that the status for all rules displays Passed a final time and click Close. The installation is complete.

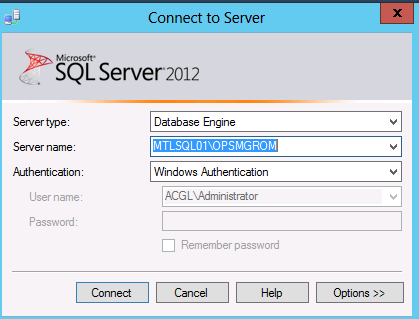
Select MTLSQL01\OPSMGROM and click Connect. This is your SQL instance that you define during installation. If you did not define any instance, just select the server name.

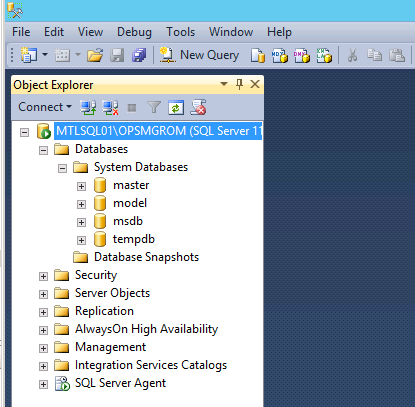
Expand the Server tree and then the Databases. Validate that the 4 databases are created and mounted.

Note: Install the last Service Pack and Cumulative Roll Up for SQL 2012.
Your SQL Server 2012 is now correctly installed.
In this article, I’ll walk you through the installation of an SQL Server 2012.
How to Install the SQL Server 2012
Setting up the SQL Server is pretty straightforward. Follow these steps:First, on MTLSQL01, open a session as an Administrator. Add the OMAdmins Group or any other group/user that will be used for this installation in the Administrators Local group of the MTLSQL01 Server and then close the session.
Note: The server name is an example. You can use whatever name fits your needs.
Open a new session with the OMAdmin user. Click Setup and then Installation. Then click the New SQL Server stand-alone… and Show Details.
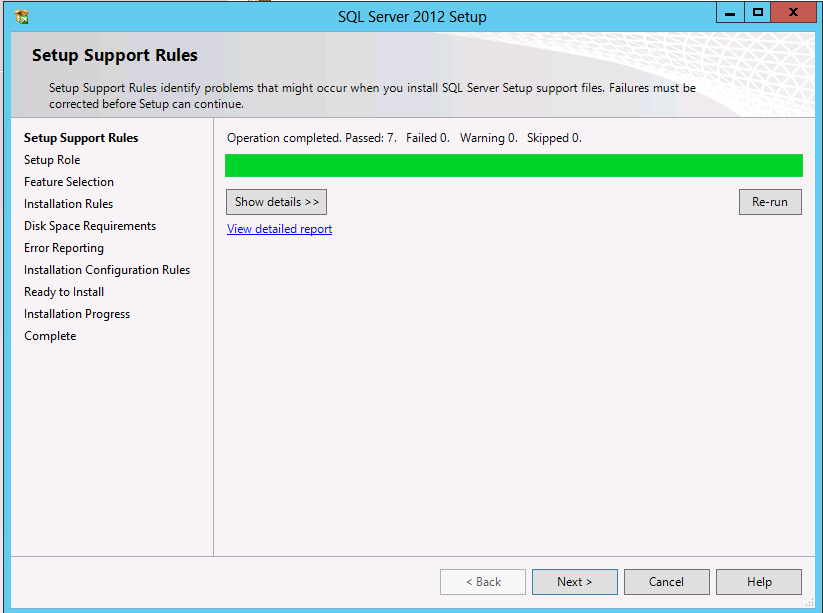
Validate that the status for all rules displays Passed. Click OK once it’s done.
Select Specify a free edition if you have an evaluation version or Enter the product key if you have a serial number. After entering your serial number (or picking the free edition), click Next.
Select I accept the Licence terms. Also, if you want to send usage data to Microsoft, you can click that box too. Click Next to get to the Server Setup Update screen. If you want to install updates, click the Include SQL Server Setup Update and click Next. The update will download and install. Once it’s done, click Show Details and validate that the status for all rules displays Passed.
Once you’re done with the update installation, continue to the Setup Role screen. Select SQL Server Feature Installation and continue.
This server will be used only by the Operations Manager Database (the short time database). The SQL Reporting Service will be installed on another server.
Select Database Engine Services and Full-Text and Semantic Extractions for Search (the latter is not mandatory). Change the path from C: to D: or any other disk.
Select Management Tools Basic and Management Tools – Complete. This will install all tools needed to manage the SQL Server. You can then continue to the next screen. Once again, check the Show Details to validate that the status for all rules displays Passed.
Select the Named Instance option and type OpsMgrOM. If you want, you can also install SQL without an instance. Once again, change the path from C: to D: and continue to the next screen. In the Disk Space Requirements screen, just click Next.
Select a domain user for both the SQL Service Agent and the SQL Server Database Engine. This user is a Domain User and doesn’t have any admin rights on the SQL Server. The Startup type must be Automatic. Then click on the Collation tab.
At this point, you can choose the default collation (SQL_Latin1_General_CP1_Cl_AS) or choose another supported collation. Click Next.
Note: The collation cannot be changed after the SQL installation. It is very important to select the collation that is supported.
Now, select Windows authentication mode. Click Add and select the OMAdmins group. Click Next. All user from this group will be a SQL SysAdmin.
Click Next on the Error Reporting screen and then Show Details. Once again, validate that the status for all rules displays Passed. Then, click Next.
Click Install to begin the SQL Server 2012 installation. Validate that the status for all rules displays Passed a final time and click Close. The installation is complete.
Validate that you can open SQL
We will now validate that you can open the SQL database. On MTLSQL01 server, make sure your session is open with a user member of the OMAdmin group. Press the Windows Key and select SQL Server Management Studio.Select MTLSQL01\OPSMGROM and click Connect. This is your SQL instance that you define during installation. If you did not define any instance, just select the server name.
Expand the Server tree and then the Databases. Validate that the 4 databases are created and mounted.
Note: Install the last Service Pack and Cumulative Roll Up for SQL 2012.
Your SQL Server 2012 is now correctly installed.
No comments:
Post a Comment